Posted on

8 Steps to Achieving Defined, Frizz-Free Locks

Curly hair, with its unique twists and turns, offers a world of styling possibilities. However, achieving well-defined curls without frizz can sometimes feel like a daunting task. This article provides comprehensive guidance on how to embrace your natural curls and style them to perfection.

Understanding Your Curls

Before diving into styling techniques, it’s important to understand the nature of your curls. Curly hair comes in various types, ranging from loose waves to tight coils. Identifying your curl type helps in choosing the right products and styling methods. The most common classification system divides curls into Type 2 (wavy), Type 3 (curly), and Type 4 (coily).

Hydration is Key

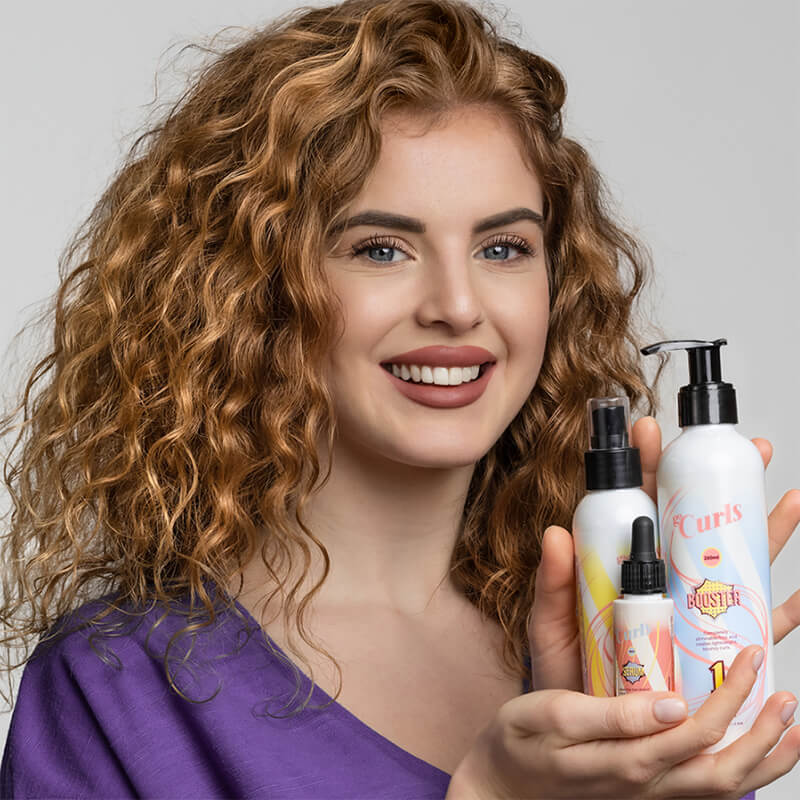
The cornerstone of defined, frizz-free curls is hydration. Curly hair is naturally drier than straight hair, making it prone to frizz. To combat this, incorporate hydrating shampoos and conditioners into your routine. Look for products that are free from sulfates and silicones, as these can strip natural oils and weigh down curls. Products like the Mazzaci GoCurls hair curling set are specifically designed to enhance and define curls.

Deep Conditioning

Regular deep conditioning treatments are essential for maintaining healthy curls. These treatments penetrate the hair shaft, providing much-needed moisture and nutrients. Use a deep conditioner at least once a week, leaving it on for 30 minutes before rinsing.

Leave-In Conditioners and Oils

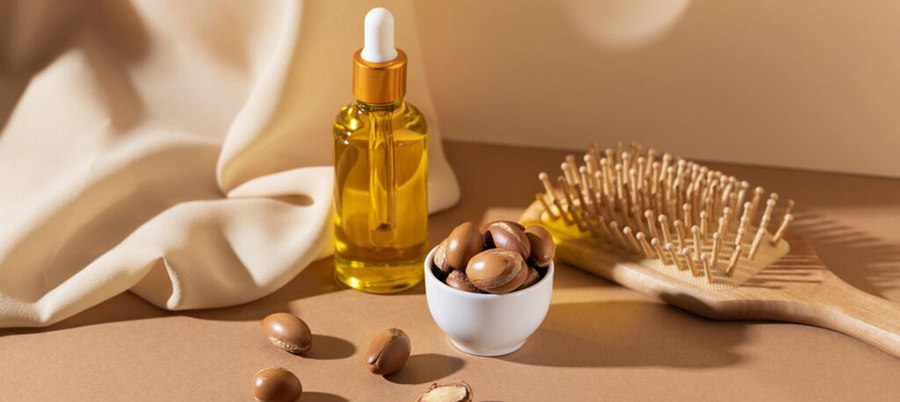
After washing, apply a leave-in conditioner to damp hair. This adds an extra layer of moisture and helps to define curls. You can also use natural oils like argan, coconut, or jojoba oil to seal in moisture and add shine.

Styling Techniques

When it comes to styling, technique is as important as the products you use. Here are some popular methods for defining curls:

  1. Finger Coiling: This technique involves wrapping small sections of hair around your finger to form coils. It works well for tighter curl patterns and helps enhance curl definition.
  2. The Scrunch Method: Apply a curl-defining cream or gel to your hair and scrunch it upwards towards the scalp. This encourages the natural curl pattern and adds volume.
  3. Diffusing: If you use a hairdryer, always attach a diffuser. This tool disperses the airflow, reducing frizz and helping to maintain your curls’ shape. Dry your hair on a low heat setting and gently cup your curls in the diffuser.
  4. The Rake and Shake: Apply styling product to your hair and use your fingers to rake it through from roots to ends. Then, grab sections of hair and shake them gently to encourage curl formation.

Avoiding Frizz

To keep frizz at bay, follow these tips:

  • Avoid brushing curly hair when dry, as this can disrupt the curl pattern and cause frizz.
  • Sleep on a silk or satin pillowcase to reduce friction and prevent frizz.
  • Protect your hair from humidity with anti-humectant products.
  • Trim your hair regularly to prevent split ends, which can lead to frizz.

Maintaining Your Curls

Curly hair requires regular maintenance to stay healthy and vibrant. Develop a routine that includes cleansing, conditioning, styling, and deep conditioning. Also, be mindful of external factors like weather and environmental pollutants that can impact your curls.

Embracing your natural curls and achieving defined, frizz-free styles is all about understanding your hair type, keeping it hydrated, and using the right techniques and products. With patience and practice, you can unlock the full potential of your curls and enjoy a range of beautiful, confident styles. Remember, every curl is unique, so what works for one person might not work for another. Experiment with different products and techniques to find what best suits your hair. Celebrate your curls and let them shine!

Posted on

Understanding DHA: The Safe Way to Tan Your Skin

Introduction to DHA’s Role in Skin Tanning

Dihydroxyacetone, or DHA, is a name you’ve likely come across in the realm of skincare and tanning. This simple carbohydrate, derived from plant sources like sugar beets and sugar cane, is the secret behind the glowing, sun-kissed skin achieved through sunless tanning products. Unlike traditional tanning methods that require sun exposure or the use of tanning beds, DHA offers a safer alternative, providing the desired bronzed look without harmful UV rays. This article delves into how DHA works its magic on your skin, the benefits of using it, and tips for achieving the best tanning results.

Understanding the Science of DHA in Tanning

The tanning effect of DHA is a result of a chemical reaction that occurs on the skin’s surface. When applied, DHA reacts with the amino acids in the dead layer of the skin, initiating a process known as the Maillard reaction. This reaction creates a change in the color of the skin, producing a tan that can last for several days. This process is completely safe as it only affects the outermost layer of the skin and doesn’t penetrate deeper layers or cause any permanent changes. The color typically develops within a few hours after application and can be deepened with repeated applications.

The Advantages of DHA Over Traditional Tanning Methods

One of the biggest advantages of using DHA for tanning, such as Mazzaci’s TanQuick self-tanner, is its safety profile. Traditional tanning methods, such as sunbathing or using tanning beds, expose the skin to harmful UV rays, increasing the risk of skin damage and skin cancer. DHA provides a compelling alternative, offering a tan without these risks. Additionally, it gives users the ability to control the depth and evenness of their tan, something that is harder to achieve with natural sun exposure.

How to Apply DHA for an Even, Natural-Looking Tan

For those looking to achieve the perfect DHA tan, the application process is key. DHA-based tanning products, including lotions, sprays, and mousses, should be applied evenly across the skin. Exfoliation before application is crucial as it removes dead skin cells and provides a smooth canvas for the tan. After application, it’s important to allow the product to dry completely and avoid showering for a certain period to let the tan develop fully. Regular moisturizing after application helps prolong the tan and keeps the skin hydrated.

Busting Myths and Misconceptions About DHA Tanning

Despite its popularity, there are several myths surrounding DHA tanning. One common misconception is that it provides sun protection, which is not the case. It’s important to still use sunscreen to protect the skin from UV rays. Another myth is that DHA tanning can cause skin aging or damage, but the truth is that it’s a much safer alternative compared to UV tanning, which is known to accelerate skin aging and increase the risk of skin cancer.

Expert Opinions on DHA Tanning

Many dermatologists and skincare experts recommend DHA as a safer alternative to traditional tanning methods. They emphasize its benefits in providing a natural-looking tan without the risks associated with UV exposure. Experts also suggest choosing DHA products that are formulated with skin-nourishing ingredients for additional skincare benefits.

Embracing the Benefits of DHA for a Safe Tan

In conclusion, DHA stands as a revolutionary ingredient in the world of skin tanning, offering a safe, efficient, and convenient way to achieve a beautiful, natural-looking tan. By understanding how it works, following the best practices for application, and being mindful of safety precautions, you can enjoy the glow of tanned skin without the risks associated with traditional tanning methods.